
A Home Assistant server usually runs quietly in the background. Once it is set up, it may be tucked away in a cupboard, server room, or behind a TV with no monitor, keyboard or mouse connected.
That is great – until something goes wrong.
If Home Assistant fails to come back after an update, a mini PC stops responding, or a Proxmox server does not boot correctly, you would normally need to find a monitor, HDMI cable, keyboard and mouse before you can see what is happening.
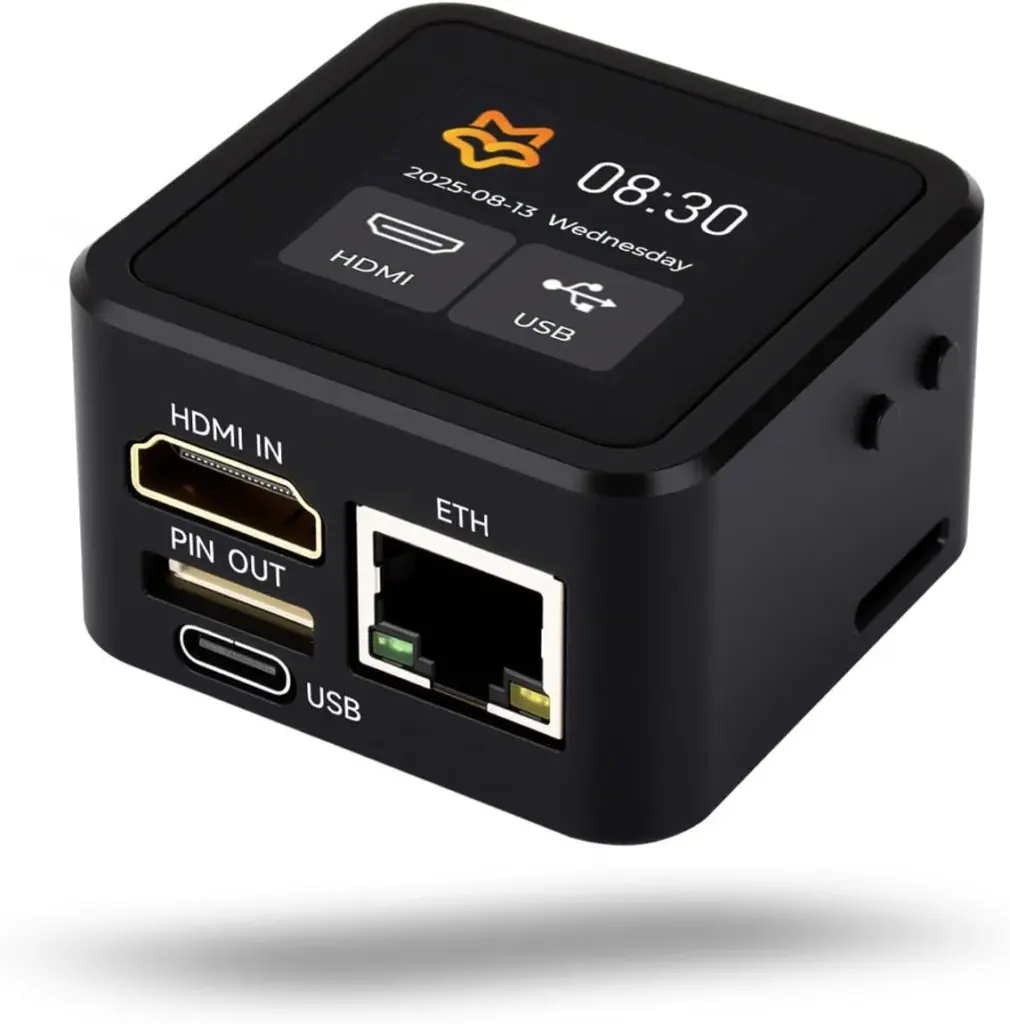
The LuckFox PicoKVM gives you an easy fallback. It connects directly to your server and lets you view its screen, use a remote keyboard and mouse, access BIOS settings, and diagnose boot issues from anywhere with a wifi connection.
Table of Contents
What can the LuckFox PicoKVM be used for?
Recovering a server remotely
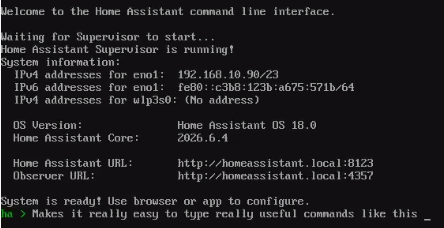
If Home Assistant stops loading, SSH is unavailable, or the dashboard cannot be reached, PicoKVM lets you see the mini PC’s HDMI output remotely.
This can help you check whether the machine is powered on, stuck at a boot screen, missing its SSD, repeatedly restarting, or showing an error after an update.
Once connected, PicoKVM can also provide keyboard and mouse control for consoles, recovery screens and installers.
Managing a Proxmox host
PicoKVM is useful when Home Assistant runs alongside other services on a Proxmox host, such as Zigbee2MQTT, Frigate, Node-RED, Pi-hole, Docker containers or virtual machines.
If Proxmox does not load, its web interface is unavailable too. PicoKVM gives you a view of the physical host, helping you diagnose boot problems and access recovery tools.
Its virtual-media feature can mount an uploaded ISO as a USB drive or CD/DVD drive, allowing recovery or installation media to be made available remotely.
Supporting servers at another property
PicoKVM is useful for holiday homes, rentals, offices, customer installations and servers managed for friends or family.
Instead of asking someone on-site to connect a monitor and keyboard, you can remotely view the machine and see what is actually happening.
Viewing the host machine
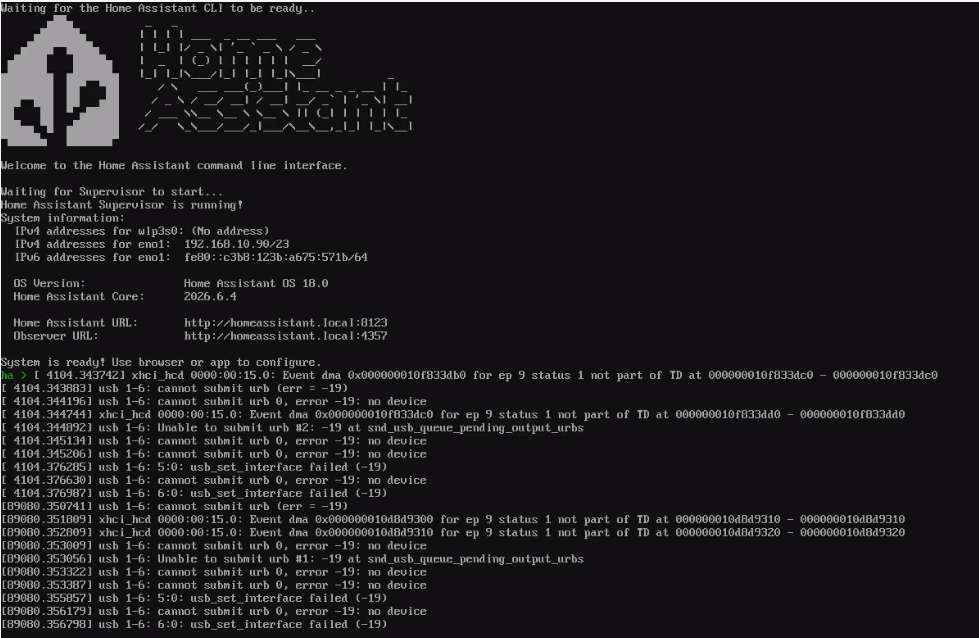
PicoKVM shows the connected mini PC’s HDMI output, including boot messages, Linux consoles, installer screens and error messages that would normally be hidden on a headless server.
The USB connection lets PicoKVM act as a keyboard, mouse and virtual USB drive. Use a proper USB data cable: a power-only cable may switch PicoKVM on but will not provide control.
Important note about restarts
In a standard USB-powered setup, PicoKVM may lose power when the host restarts or loses power. It reconnects once USB power returns, but this can make it difficult to catch the brief BIOS or boot-menu window.
For reliable remote BIOS access, boot-device selection and power control through restarts, PicoKVM needs to remain independently powered or be used with the optional PicoKVM Ext power-management board.
Basic setup with a Home Assistant mini PC
The physical setup is straightforward:
Mini PC HDMI output  →  PicoKVM HDMI input
Mini PC USB-A port   →  PicoKVM USB-C host connection
PicoKVM Ethernet     →  router or network switch
Mini PC Ethernet     →  router or network switch
The HDMI cable sends the mini PC’s screen to the PicoKVM.
The USB cable powers the PicoKVM and allows it to act as a remote keyboard, mouse, and virtual USB device.
The Ethernet cable gives the PicoKVM its own network connection. This is important: the PicoKVM is separate from the mini PC, so it can remain reachable even when Home Assistant itself is not responding.
Once connected, the PicoKVM should receive an IP address from your router. On models with a display, you can normally view the local IP address directly on the PicoKVM screen.
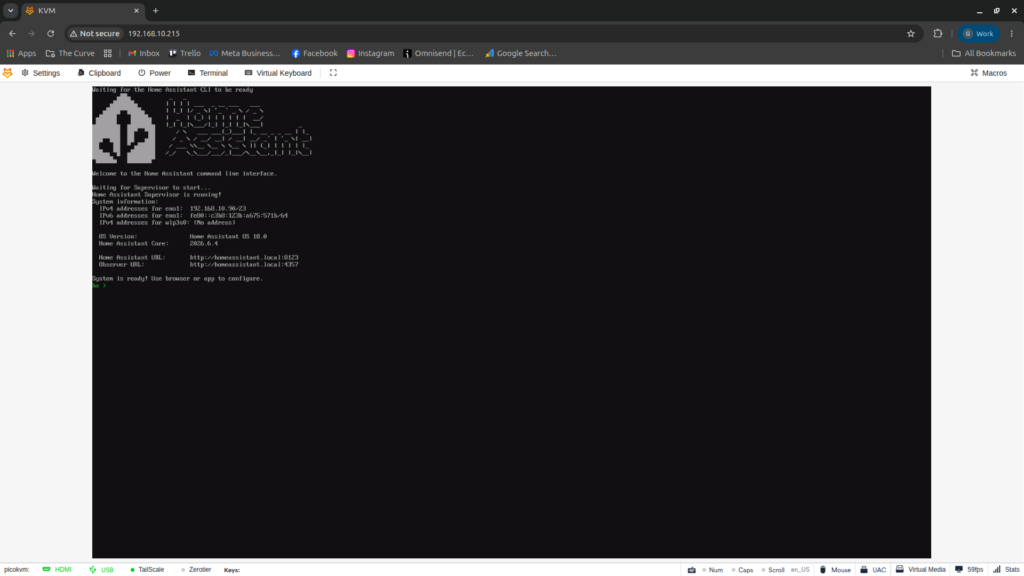
You can then open that address in a browser on the same network, for example:
http://192.168.1.150
Accessing PicoKVM remotely with Tailscale
Accessing PicoKVM locally is useful, but the real benefit comes from being able to reach it when you are away from home.
The safest way to do this is with Tailscale.
Tailscale creates a private encrypted network between your devices. Rather than exposing the PicoKVM directly to the public internet through router port forwarding, you install Tailscale on the devices you want to use and sign in with the same account.
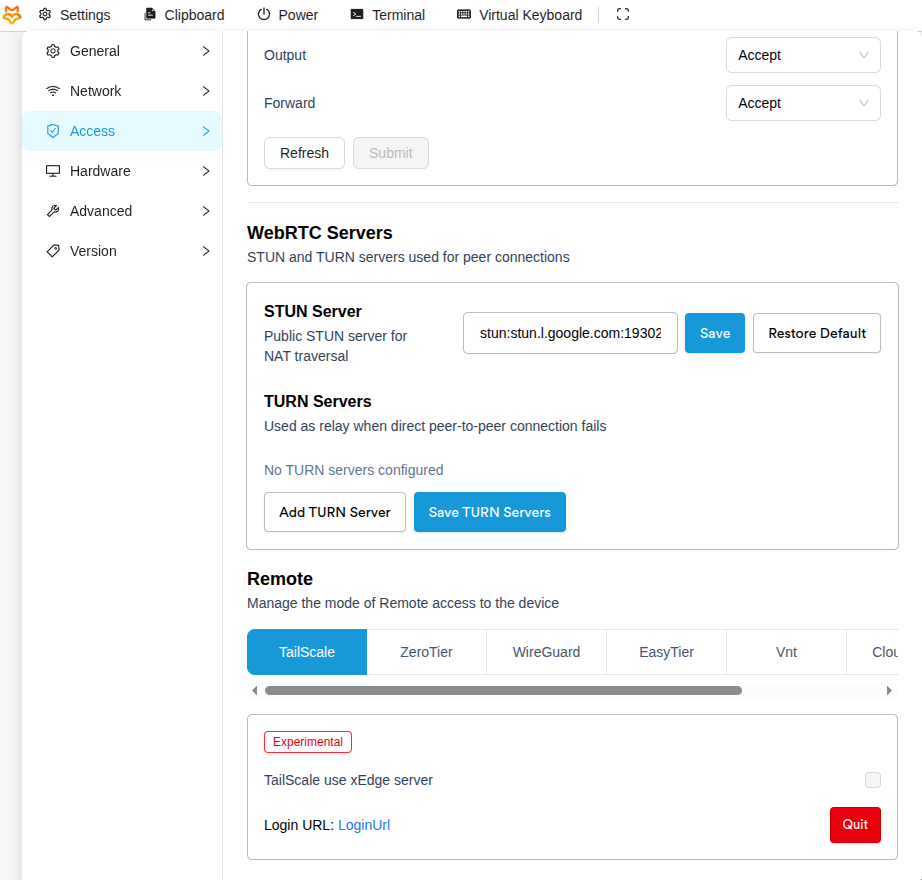
To access PicoKVM remotely, first open its web interface while you are on the same local network. Go to Settings → Access, enable Tailscale, then open the login link provided and sign in to your Tailscale account.

Wait for PicoKVM to appear in your Tailscale network and receive a Tailscale IP address or device name. You will also need Tailscale installed and signed in on the laptop, phone or tablet you want to use for remote access.
Tailscale installation differs slightly by operating system. Their quick-start guide covers Windows, macOS, Linux, Android and iPhone/iPad.
Once both devices are connected to the same Tailscale network, you can open the PicoKVM web interface from another house, mobile data, work Wi-Fi or while travelling.
Is PicoKVM Right for Your Setup?
For most day-to-day tasks, you will still manage your system through Home Assistant, SSH, Proxmox or another web interface. PicoKVM is there for the moments when those normal tools are unavailable and you need to see what the physical machine is doing.
It is particularly useful for Home Assistant mini PCs, Proxmox hosts, NAS devices, homelabs and servers located at another property. Rather than travelling to the machine or asking someone to connect a monitor and keyboard, PicoKVM gives you a way to check its screen, diagnose visible boot issues and interact with the system remotely once it is online.
The LuckFox PicoKVM is a compact and affordable way to add another layer of resilience to a server setup. It will not prevent every failure, but it can turn an unknown outage into something you can see, understand and begin troubleshooting from wherever you are.